Do It Yourself Project: Crafting Concrete Refrigerator Magnets
Don’t we all need more refrigerator magnets to hang those art projects from our kids? A group of seniors had a blast making these miniature concrete pieces and learned a lot about concrete.
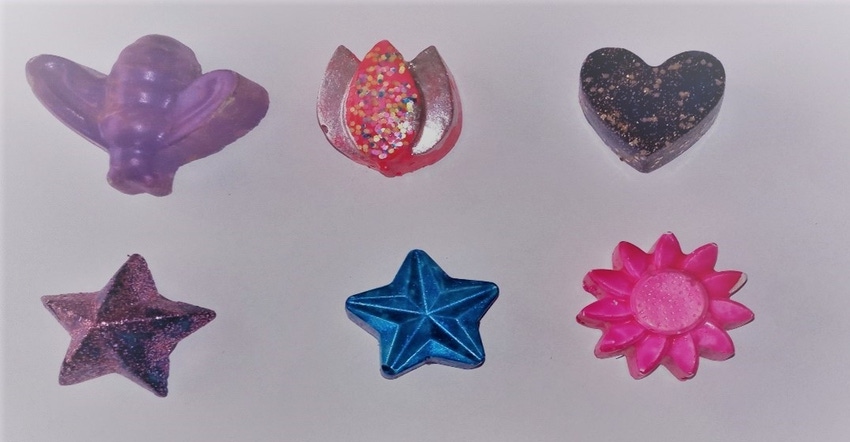
Members of the Legacy Village, a senior retirement village in Ohio, got creative this year and made concrete refrigerator magnets. Why? Who wouldn’t want a unique gift that no one in our family has or has even thought that they needed? Don’t we all need more refrigerator magnets to hang those art projects from our kids? And who can resist a special magnet made with love and concrete by their aunt, uncle, parents, or grandparents?
Unlike most projects at the retirement village, working with concrete takes several sessions with delays between each activity. First, you need to make the samples and wait at least one day before removing them from the forms. Then, in about one week, the concrete has cured and dried so it can be painted, and the magnet applied.
When planning this project, I contacted Ohio Concrete and the Ohio Precast Concrete Association for their support. They wholeheartedly agreed to be sponsors for the materials needed for the project plus provide pizza to make this an event to remember.
Batching the Concrete
To do this project, you need the following materials:
Cement or plaster of Paris, 5 pounds—available at a local batch plant or hardware store
Perlite, 8-quart bag—garden or hardware store
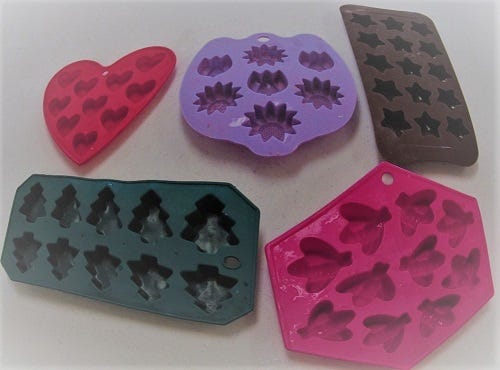
Candy molds (one form for every 2 people)— molds with hearts, stars, and flowers work best. I don’t recommend cactus, pineapple, or oddly shaped forms with thin sections, since it is difficult to remove these sample from the mold without damage. Molds are available online or at craft stores.
Plastic spoons, plastic bowls, craft sticks (popsicle sticks)—discount stores or craft stores
½- to 1-inch disc magnets with adhesive backing—online or at craft stores; I used X-BET magnetic circles (0.8-inch diameter)
Coarse sandpaper
Fingernail polish, several bottles with a variety of colors
1/8-cup (2-Tablespoon) measuring spoon
Water
Coloring agent (optional)—available at a hardware or building supply store
Cans of compressed air—craft or computer store
During the first session, we made the concrete using perlite, portland cement, and water. Most in our group had never made concrete before so we provided a specific mixture design of 1 part cement (1/8 cup) to 2 parts perlite (¼ cup). All material was measured by volume since this is the easiest way to get accurate quantities with equipment that was easy to use. Water was added so that the final concrete mixture resembled a brownie mixture. I used a cooking analogy since most of our group had made cookies and were used to following a recipe. They were making about a ½ pound of concrete at a time, so any deviation from the recipe could have been disastrous. This is a lesson most of us that work with concrete have learned the hard way. It was a challenge to make sure the concrete mixture was made with a limited amount of water to get the “brownie mix” consistency.
Making the Magnets
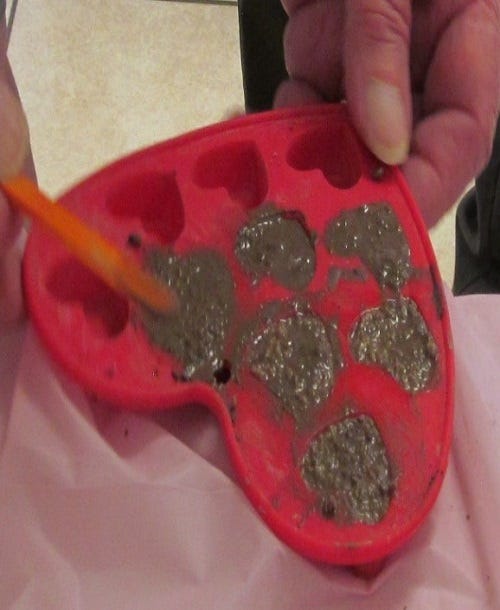
Once the concrete was batched, the next step was to place it into the molds. We used plastic spoons to place the concrete and a craft stick and the back of the spoon to consolidate the mixture. Since the samples were very small, an air pocket (entrapped air) would ruin the sample, so we were careful to consolidate well. They then finished the concrete using the craft stick (their finishing tool). The samples were then moved to a safe area where they were undisturbed until the next session.
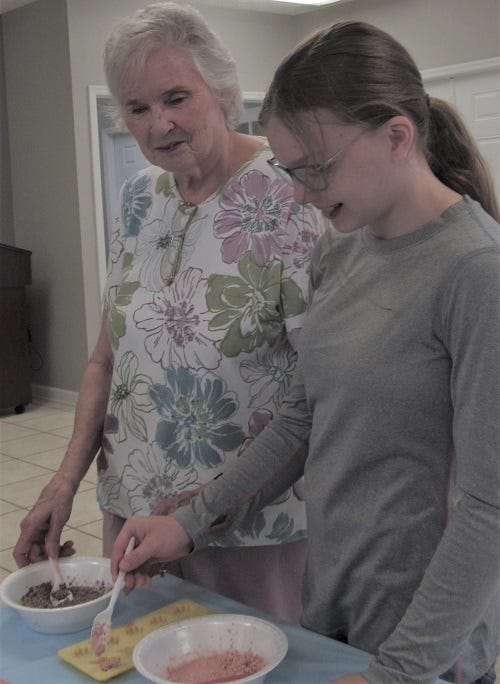
The waste concrete, mixing bowl, spoon, and craft sticks were put into the solid waste trash. I cautioned them not to put any waste in the sink as this could clog the plumbing. The group was instructed to wash immediately so that no cement or concrete residue remained on their clothing or hands.
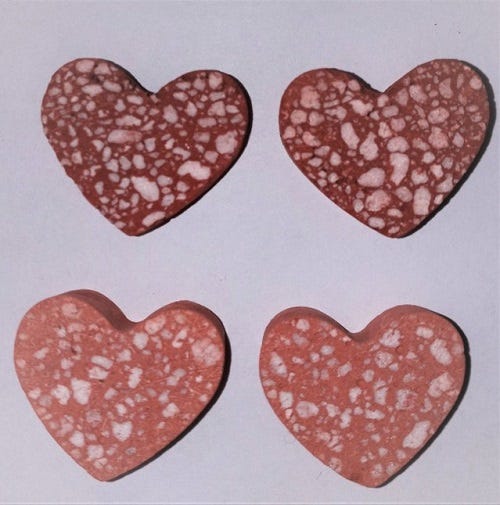
Those in our group making concrete hearts added a red color to the mixture and used Plaster of Paris as the cement. (Plaster of Paris is pure gypsum and is likely one of mankind‘s first cements). The perlite will not take the color, so while the Plaster of Paris paste was red, the perlite remained a brilliant white. When they sand the heart afterwards, they got a magnet with a speckled look that many people liked.
The day after the concrete was cast, the magnets were removed from the forms and stored where they would both cure and dry out. We kept the samples at room temperature and in a dry environment. The concrete had enough excess moisture so that the hydration continued for at least a week. We planned to paint the concrete, so the concrete also needed to dry. This concrete is not intended for structural use, so its strength is not important. The strength of this concrete is likely about 100 psi. When dried, our concrete samples were extremely light and would actually float in water.
There were three steps to finishing the concrete refrigerator magnets. First, the concrete surface the magnet was to be attached to was sanded to make it relatively smooth. Once the surface was sanded, we use compressed air to blow the dust from the samples. This was done outdoors wearing a face mask.
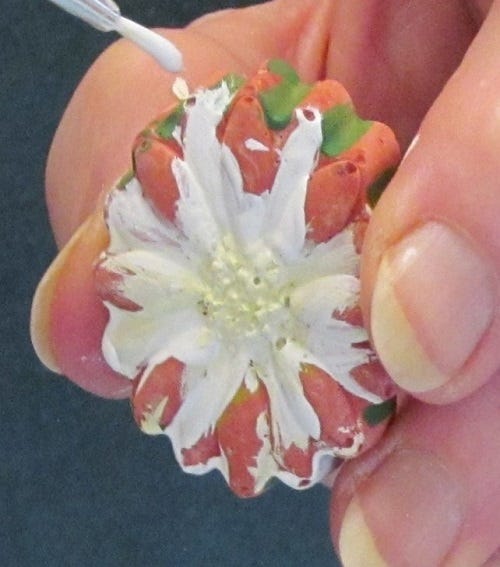
The final step was to paint the samples. Fingernail polish is ideal since each bottle has its own brush and it is available in a variety of colors, is easy to apply, and dries in minutes. We encouraged our group to be creative; some of the more craft-oriented members used acrylic paint with brushes.
The final step after the fingernail polish or paint dried was to attach the magnet to the sanded surface. Since the magnets came with an adhesive surface, we simply centered the magnet to the sample and applied a little pressure with our fingers until the adhesive was firmly attached.
The concrete refrigerator magnets were now complete and ready to wow our family members.
Lessons Learned
What did our group learn from this project? Was it just a craft activity? No, these people now look at concrete in a whole new light and have a different opinion of the second-most-used material in the world. Here is what I observed that they learned in the class and activity:
Cement is the powder or glue that holds concrete together. We do not have a cement sidewalk but a concrete sidewalk (regardless of what Sesame Street says). They loved the saying “cement is to concrete as flour is to fruitcake.”
There are concrete trucks and cement trucks. The big trucks they see with the rotating drum are concrete mixer trucks that deliver concrete to a jobsite ready to be used to build our structures and roads. A cement truck is a tanker and looks sort of like the trucks that deliver gasoline. The cement trucks deliver the cement to companies that use it to make concrete—batch plants and precast concrete plants.
Concrete is custom made to meet the needs of how it is to be used. We can alter the mix design so that the concrete has the exact properties we need. In most cases we want concrete to be strong and durable so we can use it in buildings and roads. In other applications, we want it to stabilize the rocks on a hillside or provide an attractive sound barrier on our roadways. In the case of the magnets, we wanted a concrete that was extremely light and attractive—we weren’t concerned with strength.
Concrete can be made beautiful. Although many people have seen architectural, colored and exposed aggregate concrete, they may not have paid attention to it until now. Prior to this activity, most of those in our group had the impression that concrete is just a grey functional material. They now see concrete differently. It can be attractive as well as functional.
Working with concrete can be fun. Most of our group had never said that before! For those of us that work in the concrete industry, we may not often say that working with concrete is fun, but maybe we need fresh eyes to remind us just how great our industry is and that it is fun to be creative with concrete.
I want to thank Ohio Concrete, the Ohio Precast Concrete Association, Phillips Companies, and Quikrete for supporting this activity. They supplied all the materials to make this project a reality plus the pizza was an extra bonus.
Luke M. Snell is a Concrete Consultant Concrete and an Emeritus Professor of Construction from Southern Illinois University Edwardsville.
About the Author(s)
You May Also Like


